Building the mold for the body of the instrument.
Making the plexiglass template

Before we touch the boards that will make up the mold, we need a plexiglass template to define its outline — it will also come in handy for tracing the profile onto the boards.
- Lay a 2 mm plexiglass sheet over the 1:1 paper plan so that the long edge lines up with the centreline of the body.
- Trace the body's outline onto the plexiglass with a permanent marker, ideally fine-tipped. On a guitar with a symmetrical body it is better to draw only half the outline; if there is a cutaway, though, you need the full outline.
- With a fretsaw, cut the plexiglass about 1 mm outside the line, leaving the exact outline to be finished by hand.

Holding the plexiglass against the drawing, work the outline as precisely as you can. Abrasive paper works well here.
Building the mold

For the mold itself you can use:
- Marine plywood. The strongest, but also the priciest.
- Poplar or birch plywood.
- MDF (Medium Density Fibreboard). A medium-density wood product. Great value and easy to work, but not very moisture-resistant.
Once built, a mold can be reused any number of times and, if made well, becomes a valuable piece worth handing down — so looking after it matters. Which material to use depends a lot on where it will be stored.

The 8 boards should be about 5 cm larger all round than the body outline, and 1.8–2 cm thick.
Use the plexiglass template to draw the outline on each board.

With a band saw — or even a jigsaw — cut out the inner part of each board, staying about 2 mm inside the line (shown in red).
Do the same with all the boards.

From here you can go two ways.
1 — By hand with rasp and square
(Only if you cannot use a router!)
By hand it is fairly hard going. But early on, with nothing else to hand, I had to do it this way.

Glue 4 pieces together for the first half and the other 4 for the second, keeping the ends aligned. Clamp the two halves together and rasp all 8 profiles at once down to the final line, checking constantly with the square that the section stays perpendicular.

Once the profile is done, separate the two halves and glue them symmetrically onto a board. Alternatively, hinge them together, leaving one side open.
2 — With router and flush-trim bit (recommended)

Personally I use 9 boards. The extra one, worked by hand, serves only as a template for the rest.
This time I finish only that first board by hand. I leave the outer shaping for later, because the surplus wood gives me somewhere to clamp during routing. The hand-shaped board becomes the template for trimming all the others — we will call it the "copy".

Clamp the "copy" and a board to be trimmed onto a bench, overlapped with the ends aligned. Rout with a flush-trim bit. The blue area is the part to be routed.
A flush-trim bit has a bearing at the bottom that sits perfectly in line with the cutting edges. As the bearing rides along the copy (in red), the cutters shape the upper board to match the one below exactly.

Use the copy to rout every board. Join them 4 at a time and mirror them symmetrically.
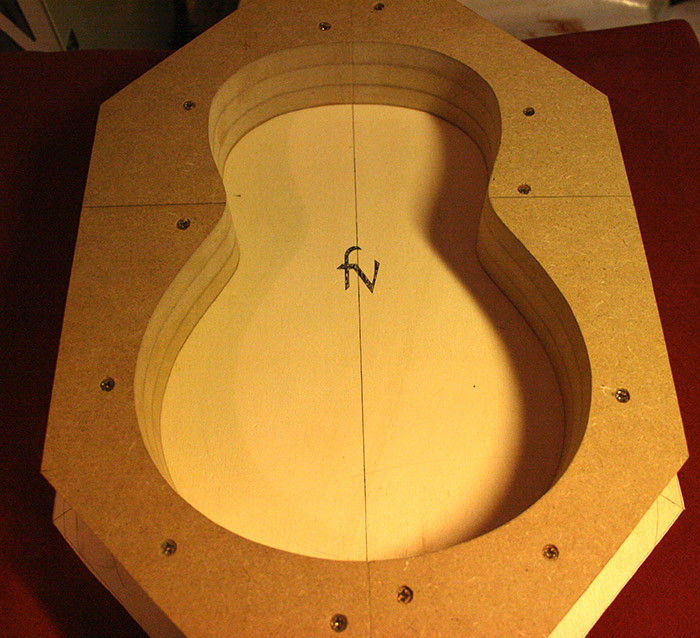
Tenor ukulele mold, made with a flush-trim bit. (For a ukulele, 6 small boards are enough.)