In the book "Diary of Building a Soprano Ukulele", 3 chapters are devoted to preparing, applying and French polishing with shellac using a pad — with photos and demonstration videos!
French polishing with shellac using a pad
Ingredients
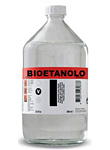
Alcohol: colourless denatured ethyl alcohol at 96°, distilled from carbohydrate- and sugar-rich crops (maize, sorghum, wheat, barley, etc.) and from cellulosic biomass. Bioethanol can be used instead of denatured ethyl alcohol, with the bonus of doing away with the annoying pinkish residue and the bad smell left by the denaturant. That makes bioethanol ideal for dissolving all sorts of resin (shellac, dewaxed shellac, sandarac, copal, benzoin, etc.) and for cleaning up, including mixed with water, acetone, turpentine and so on.
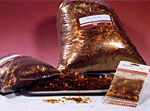
Natural shellac flakes, especially suited to pad finishing and the polishing of antique furniture and wooden objects.
OR
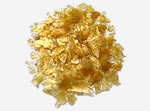
Dewaxed shellac flakes, bleached and stripped of colouring matter, for particular restoration needs or for use on pale woods.
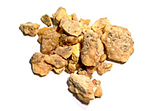
Benzoin gum is a prized resin. In pad polishing, a small percentage of benzoin added to the shellac gives a high shine and improves its glide. That makes benzoin gum essential for reaching the characteristic top level of finish.
Dewaxed shellac is the one to use on pale woods such as spruce and maple.
Preparing the 20% stock solution
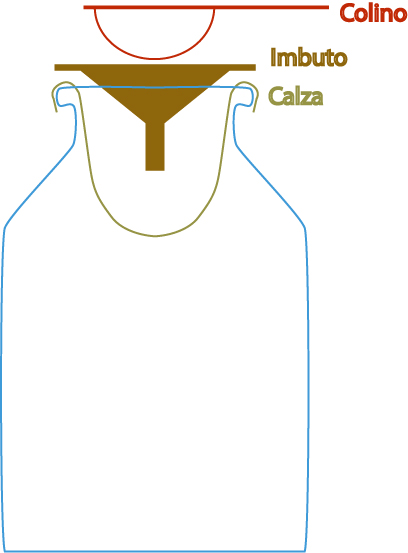
- Pour 200 g of shellac flakes into a 1 L container.
- Top it up with alcohol until full.
- Mix well, seal tightly, shake, and leave for about 12 hours.
Filter the solution. Pour it into a clean container through a nylon stocking and a strainer to catch any residue.
Preparing the 4 solutions
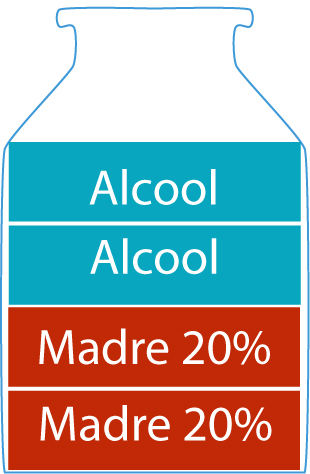
10% solution: fill a container ½ with the stock solution (20%) and ½ with alcohol.

7.5% solution: fill a container ¾ with the 10% solution and ¼ with alcohol.
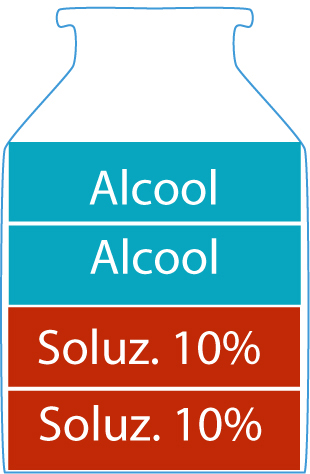
5% solution: fill a container ½ with the 10% solution and ½ with alcohol.
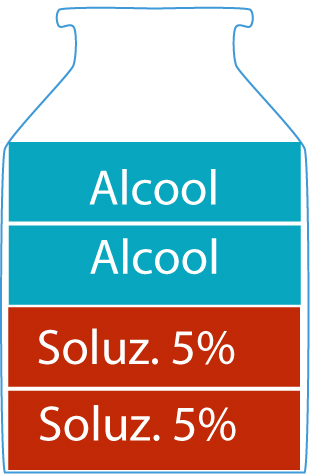
2.5% solution: fill a container ½ with the 5% solution and ½ with alcohol.
For the final glazing you can use a 2–3% benzoin solution. You make it exactly as described for the shellac. Use ½ of the 5% solution to reach the required 2.5%.
Building the pad
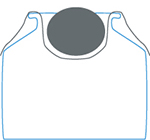
To build the pad you need:
- 2 cloths of white cotton, linen, or linen/cotton, 15x15 cm. Use linen for the early coats and cotton for the last ones.
- Undyed wool, which, balled up, forms the core of the pad. To firm it up you can tuck some absorbent cotton inside the wool. Cotton on its own is not a good idea — it hardens and does not lay the shellac down evenly.
- 2 jars: one for charging the pad, one for storing it.
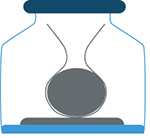
- Lay the first cloth over the mouth of the jar.
- Set the core on top.
- Pour the solution into the core.
- Press so the solution soaks in.
- Squeeze the pad so it does not leak too much.
- Wrap it in the second cloth.
Storing the pad
- Keep the pad in a tightly sealed jar.
- Pour in a few millimetres of alcohol to keep the air inside saturated.
- Add a spacer so the pad does not touch the alcohol.
The finishing stages
Sanding. Sand the wood up to 1500 grit, working through the grades: 60, 80, 120, 180, 220, 400, 600, 800, 1200, 1500.
Wetting. Wipe the wood with a wet cloth to dampen it thoroughly, then let it dry. This raises all the wood's "whiskers", and you will now feel the roughness to the touch. Do not skip this step — leave it out and the whole job is ruined.
Sanding. Start again with 1500 grit, then 2000. Personally I also go over it with 2500, 3000 and 5000.
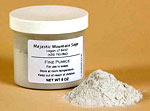
Pumicing. This fills the pores of the wood. Very fine "4/0" pumice powder is scattered evenly over the board — you can do this by dabbing it on from a cloth bag. Once it is spread, wipe crosswise to the grain to lift off the excess.
Go over it with the pad lightly charged with the 2.5% solution. Spread it well, first parallel to the grain, then in circles, then in figure-eights (described later).
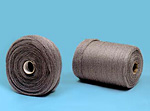
Let it dry well (8 hours is fine). Go over it with extra-fine "0000" steel wool to remove any lumps that have formed. Personally I skip this step on purpose: to keep a more handcrafted look, I prefer not to fill every pore.
Roughing out
N.B. It is a good habit to brush on the first coats using the 10% or even 20% solution. This builds up a good layer of shellac quickly, and the later passes with the weaker solutions then work on top of it to bring up the polish.
N.B. There is no oil at any point in this process!
Hold the pad with thumb, index and middle finger, and hold its tail with the ring finger, little finger and the palm. Flatten the face that will meet the wood.
Go over the surface with the pad charged with the 10% solution.
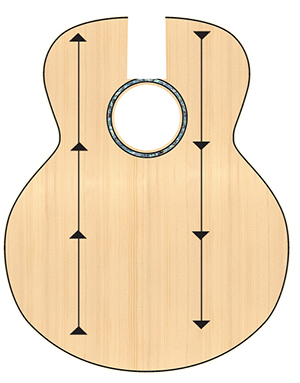
The first pass runs parallel to the grain — this is the application. Ideally, stand so the light reflects off the board; that way you can watch the work as it develops.
Warning! Never let the pad stop! Land and take off! Stopping the pad leaves a burn — a spot where the shellac will no longer take, and that sends you right back to the first step of this chapter!
The working
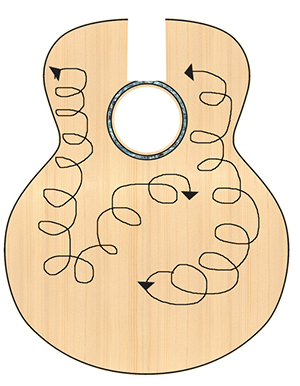
The second pass is circular: clockwise then anticlockwise, or the other way round.
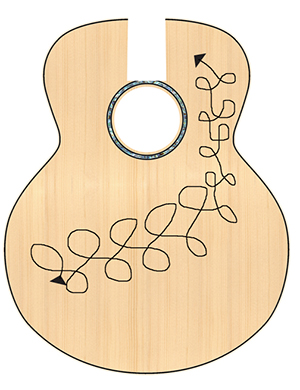
The third pass is the figure-eight, one way then the other.
The pad gives up shellac as you work. Think of it as leaving two kinds of trail. The first is with the pad freshly charged: the pass feels soft. Then the trail changes — instead of laying shellac down, the pad seems to pick it up. Its drag on the surface grows and the pass gets harder. You will know the second trail is ending when the pad stops gliding smoothly. STOP! Stop there.
Recharge the pad and repeat. Personally I do it 3 or 4 times. Since I skipped the pumicing, this has to be repeated several times. Put the pad back in the jar as described above.
Let it dry as long as possible — usually I wait 24 hours. Count this as "one coat". Bear in mind the shellac dries in a few minutes, but the alcohol does not fully evaporate for a month. Apply 2 coats for each solution.
Polishing or finishing
Before applying the 7.5% solution, go over the board with:
- 4/0 steel wool.
- 1500 abrasive paper. (Many first drop a little water onto the board, which makes the pass smoother.)
This also removes any tiny build-ups of shellac, bringing the board back to smooth and even. It will turn matte and be ready for the next solution.
Go over it with the pad charged with the 7.5% solution, the same way as before. Let it dry as long as possible.
Before applying the 5% solution, go over the board with:
- 4/0 steel wool.
- 1500 abrasive paper.
Go over it with the pad charged with the 5% solution, the same way as before. Let it dry as long as possible.
Before applying the 2.5% solution, go over the board with:
- 1500 abrasive paper.
Go over it with the pad charged with the 2.5% solution, the same way as before. Use the same passes as earlier, but finish with a "parallel" pass. Let it dry as long as possible.
Some finish with a final pass using the pad charged with alcohol alone.
The glazing
Go over the board with the pad charged with the 2.5% benzoin gum solution, the same way as before.
Notes
- For a matte final effect, go over it evenly with steel wool.
- Replace the pad each time you change solution.
- About a month later, make another pass with the 2.5% shellac solution and 2.5% benzoin gum.
- All the products listed in this guide are available online — in particular I recommend a shop on the site's links page.
- This guide is aimed at beginners and walks through the steps to a good polish on an instrument, but it is no substitute for hands-on experience, which is the single most important factor in getting an excellent result.
- For any clarification, correction, comment or question, get in touch through the site's contact area.