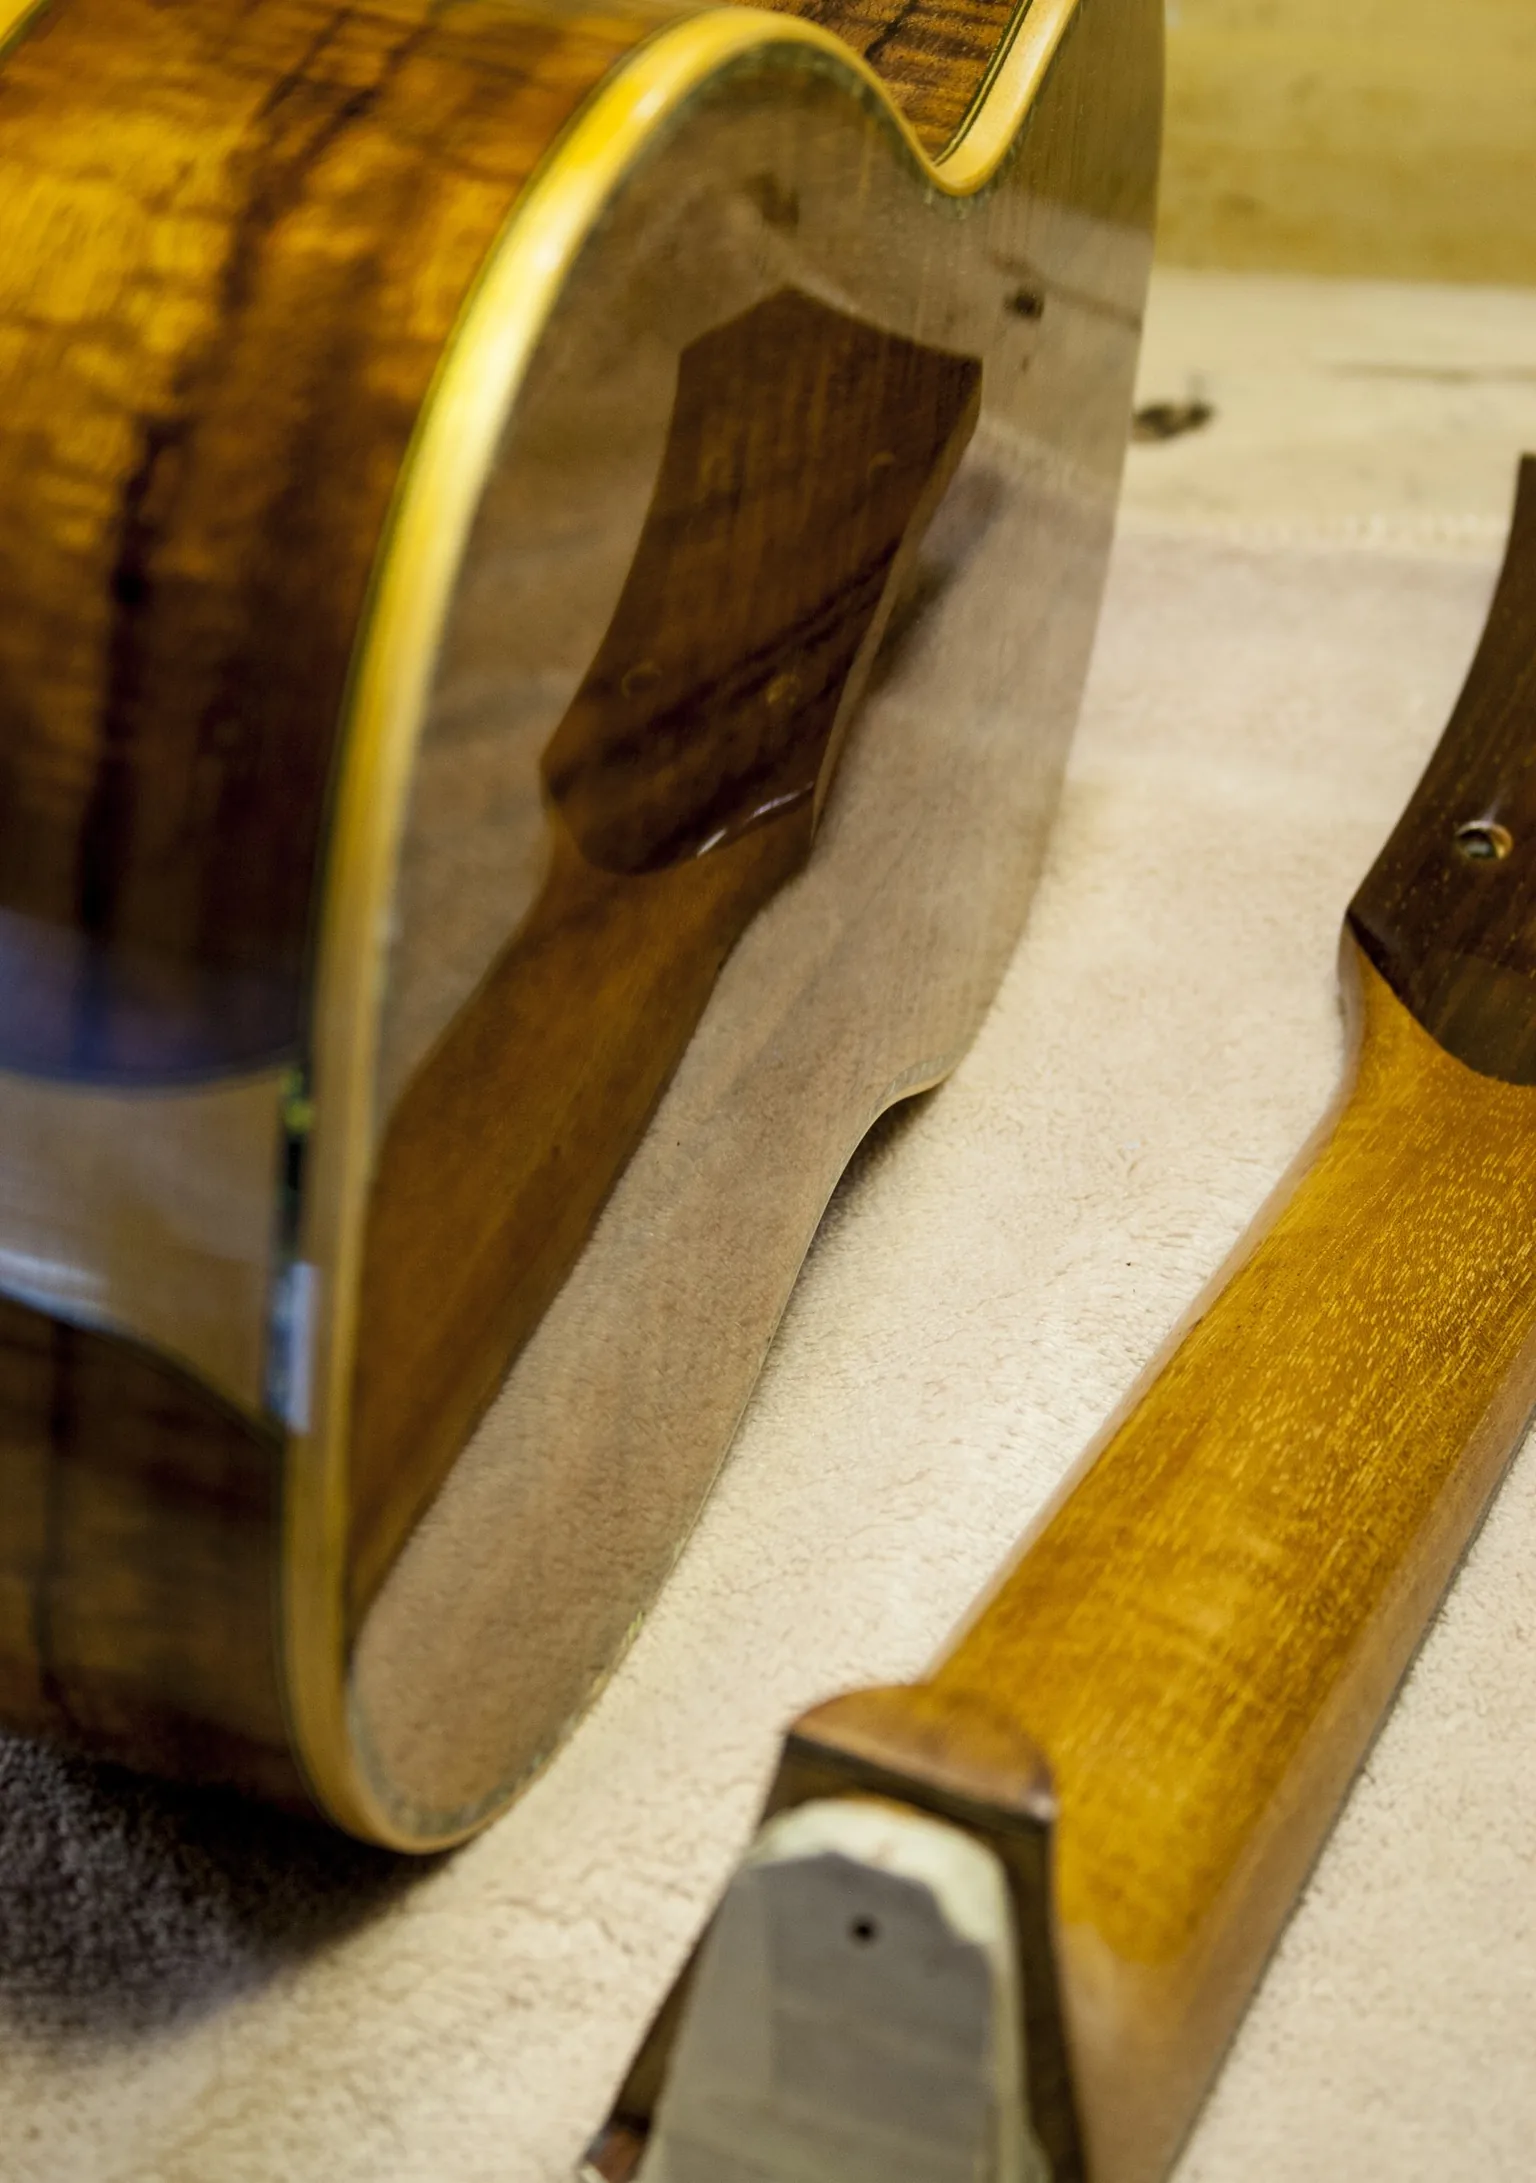
This is the guide I wish I had found when I started out. French polishing with shellac is the finish I have used on my instruments for years: natural, fragrant, extremely thin, unbeatable to look at and a pleasure to touch. It is also a technique you cannot learn by reading — but reading does spare you the mistakes that cost weeks of work.
In the opening photograph: a koa body and a mahogany neck with the polishing finished. Body and neck are finished separately, which is one of the reasons I choose the dovetail joint.
What follows is the whole procedure in the exact order I work through it in the shop: from preparing the wood to the final polish, with the concentrations, the waiting times, the typical defects and their remedies. The photographs come from my book Diario di Costruzione di un Ukulele Soprano (Volontè & Co., 2021), where the three chapters on shellac also carry four demonstration videos.
1. Shellac: what it is and where it comes from
The material
- It is a natural resin, not a synthetic product. It is secreted by the female insect Tachardia lacca, which lives in Asia: it produces the resin to protect itself, building what amounts to a shield.
- The yellow-red colour comes from the natural dye contained in the resin itself. There is also a dewaxed version, lighter in colour, which I come to shortly.
- It reaches us in flakes, to be dissolved in alcohol. You do not buy it ready made: the solution is prepared each time, and that is part of the craft.
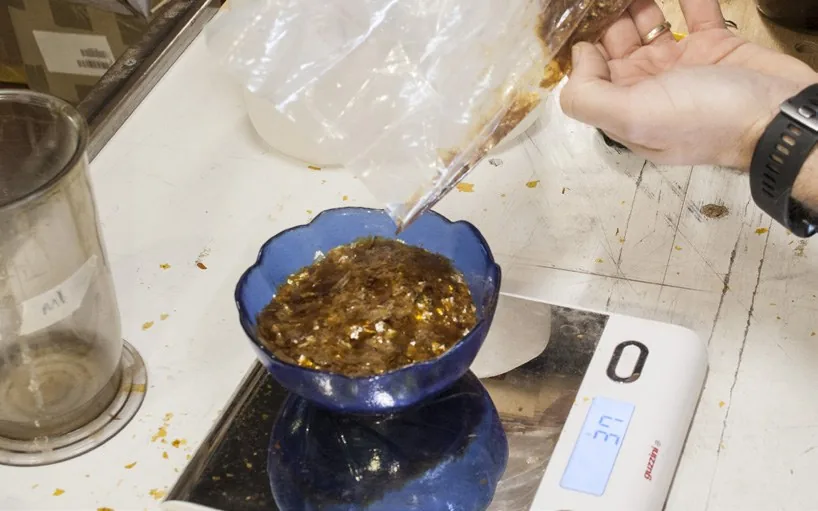
Shellac flakes on the scale. The yellow-red colour is the natural colour of the resin. Weighing is not fussiness: it is what gives the stock solution its exact proportion.
Four dates of history
- Around 200 AD — Its use as a dye is very old and predates its use as a varnish by a long way.
- 1590 — The first certain record as a wood varnish: the account of an English writer who travelled to India and described its customs. Originally shellac was rubbed on as a solid block, straight onto the lathe: it was the heat of friction that drove it into the wood, which was then burnished to a polish.
- The 17th century — It is already in use in lutherie, in the years of Antonio Stradivari (1644-1737). When I apply it to an instrument I am using the same material he had on his bench.
- The 19th century — It spreads widely across the west and completely replaces waxes and oils as a finish for furniture and instruments.
Strengths and weaknesses, no discounts
| Strengths | Weaknesses |
|---|---|
| Excellent protection, especially in relation to how extremely thin the film is. | Very sensitive to heat. A French polished instrument must not be left in a car in summer, nor near any source of heat. |
| Very hard: it can be sanded and worked with abrasives, which is what makes the whole procedure below possible. | Short lived once mixed with alcohol. A solution a few months old dries with difficulty and lays down unevenly. |
| Non-toxic — it is in fact edible. You work without a mask and without a spray booth. | Demands time and hand skill: it is a slow technique, not a spray finish. |
Dewaxed shellac
- It is obtained through very fine filtering that extracts the wax contained in the resin; the resulting colour is a pale straw.
- It is needed on very pale woods — spruce, maple. With ordinary shellac the wax would stay visible as patches and ruin the final result.
- Dewaxed shellac also respects the colour of pale woods more faithfully.
2. What you need
For the varnish
- Alcohol. I use 96° bioethanol: clear, obtained by fermenting biomass and agricultural products. Compared with denatured ethyl alcohol it has two concrete advantages: no pinkish residue and none of the bad smell of the denaturant. It works for dissolving shellac, dewaxed shellac, sandarac, copal and benzoin.
- Shellac flakes, waxed or dewaxed depending on the wood.
- Benzoin gum. A fine resin: added in small percentages it gives brilliance and improves how the pad glides.
- Mastic gum in tears (mastic gum). Like benzoin, I dissolve it straight into the stock solution.
- Pale polishing oil. A touch on the pad, for glide. I cover it in detail at point 8.
For preparing the wood
- Abrasive paper in 180, 220, 400, 600, 800 and 1200 grit.
- 0000 steel wool ("four zero"), the finest there is.
- Grain filler — I use two-part epoxy resin or a water-based filler; or, the traditional way, 4/0 pumice powder. See point 5.
- Paper masking tape for the masking.
- A cloth for raising the grain and a vacuum for the steel wool residue.
For the pad and the application
- Undyed wool for the core, and if needed cotton wool inside it to give body.
- Two white cloths of linen and two of cotton, about 15x15 cm.
- A soft-bristle brush and a small brush for charging the pad.
- Airtight jars: for the solutions, for storing the pad and for storing the brush.
3. Preparing the solutions
The stock solution (20%)
- 200 g of resin flakes to 1 litre of alcohol. It is the preparation with the highest resin content, the one I draw all the others from.
- My recipe: for every 100 g of resin, 80 g of shellac, 10 g of benzoin gum and 10 g of mastic gum. The three resins dissolve together in the same alcohol.
- I usually make half a batch — 100 g in half a litre — keeping the proportion. It is the practical application of the "a little at a time" rule.
- I stir well, close it tightly and shake. Then I leave it to stand for 24 hours.
- After 24 hours the flakes have dissolved, but the solution still holds a lot of solid residue. It has to come out.
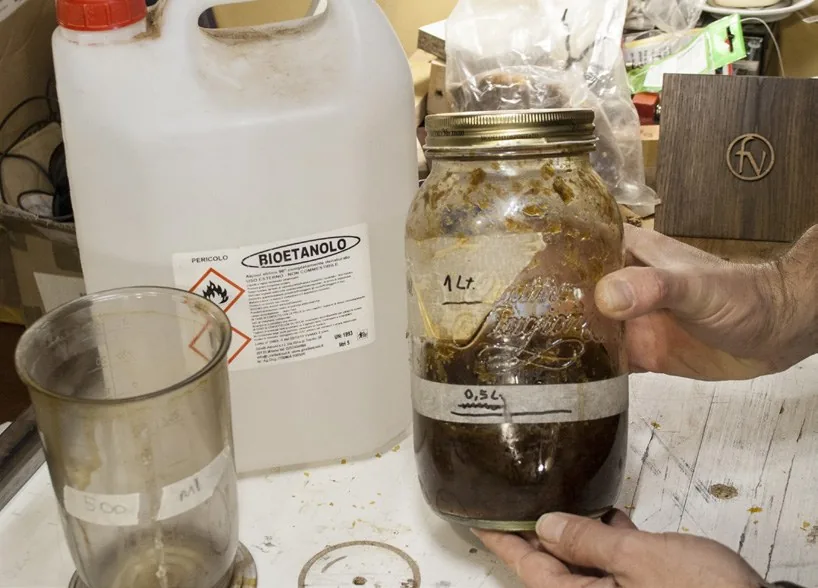
The stock solution being prepared, with the bioethanol can. The jar carries a label with the quantity: labelling and dating are part of the method, because solutions age.
Double filtering — do not skip it
- Metal strainer: it holds back the coarser residue.
- Nylon mesh (a stocking works perfectly): it holds back the fine residue too.
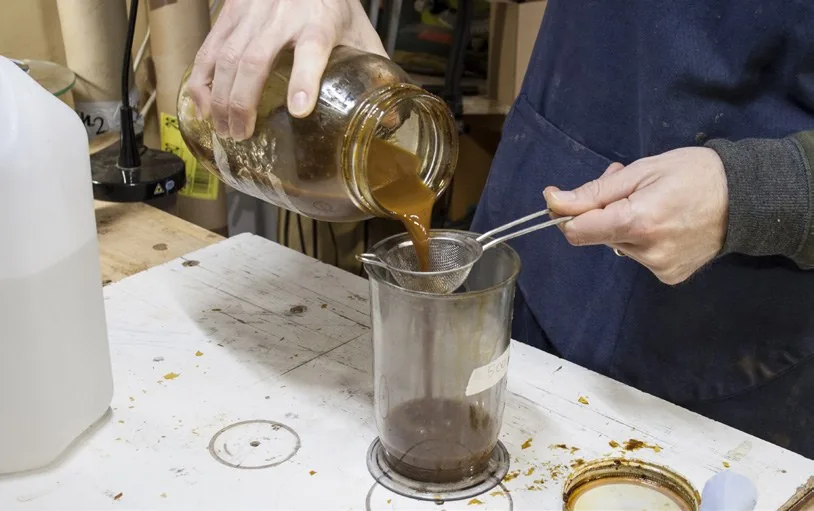
First pass: the metal strainer.
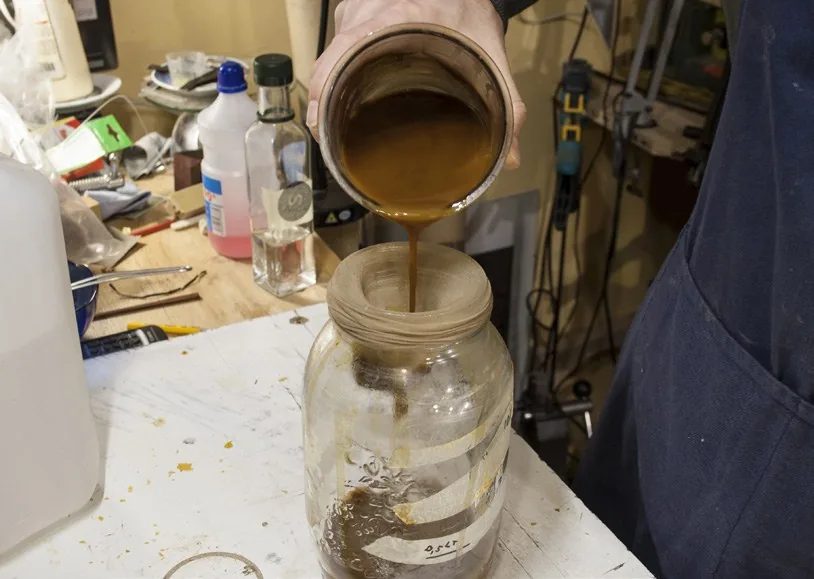
Second pass: the nylon mesh. Two filterings, not one.
The four pad solutions
From the stock I draw four solutions of decreasing concentration. They are made in sequence, each from the previous one and not from the stock, measured in equal parts by volume.
| Solution | Composition | Check |
|---|---|---|
| 10% | 2 parts stock solution + 2 parts alcohol | 20% ÷ 2 |
| 7.5% | 3 parts 10% solution + 1 part alcohol | 10% × 3/4 |
| 5% | 2 parts 10% solution + 2 parts alcohol | 10% ÷ 2 |
| 2.5% | 2 parts 5% solution + 2 parts alcohol | 5% ÷ 2 |
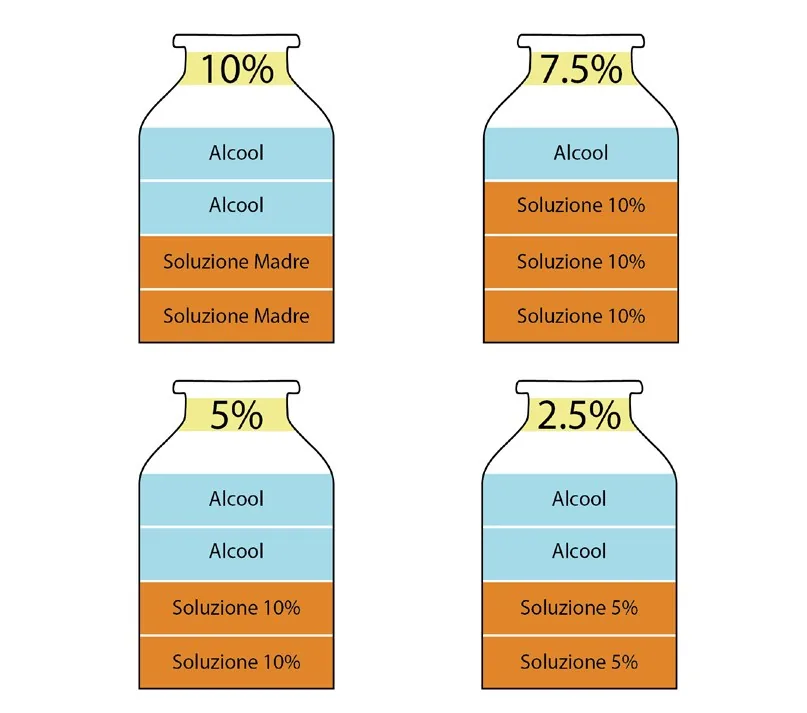
The dilution diagram. Each jar is divided into equal parts: you can read off at a glance how many parts of solution and how many of alcohol.
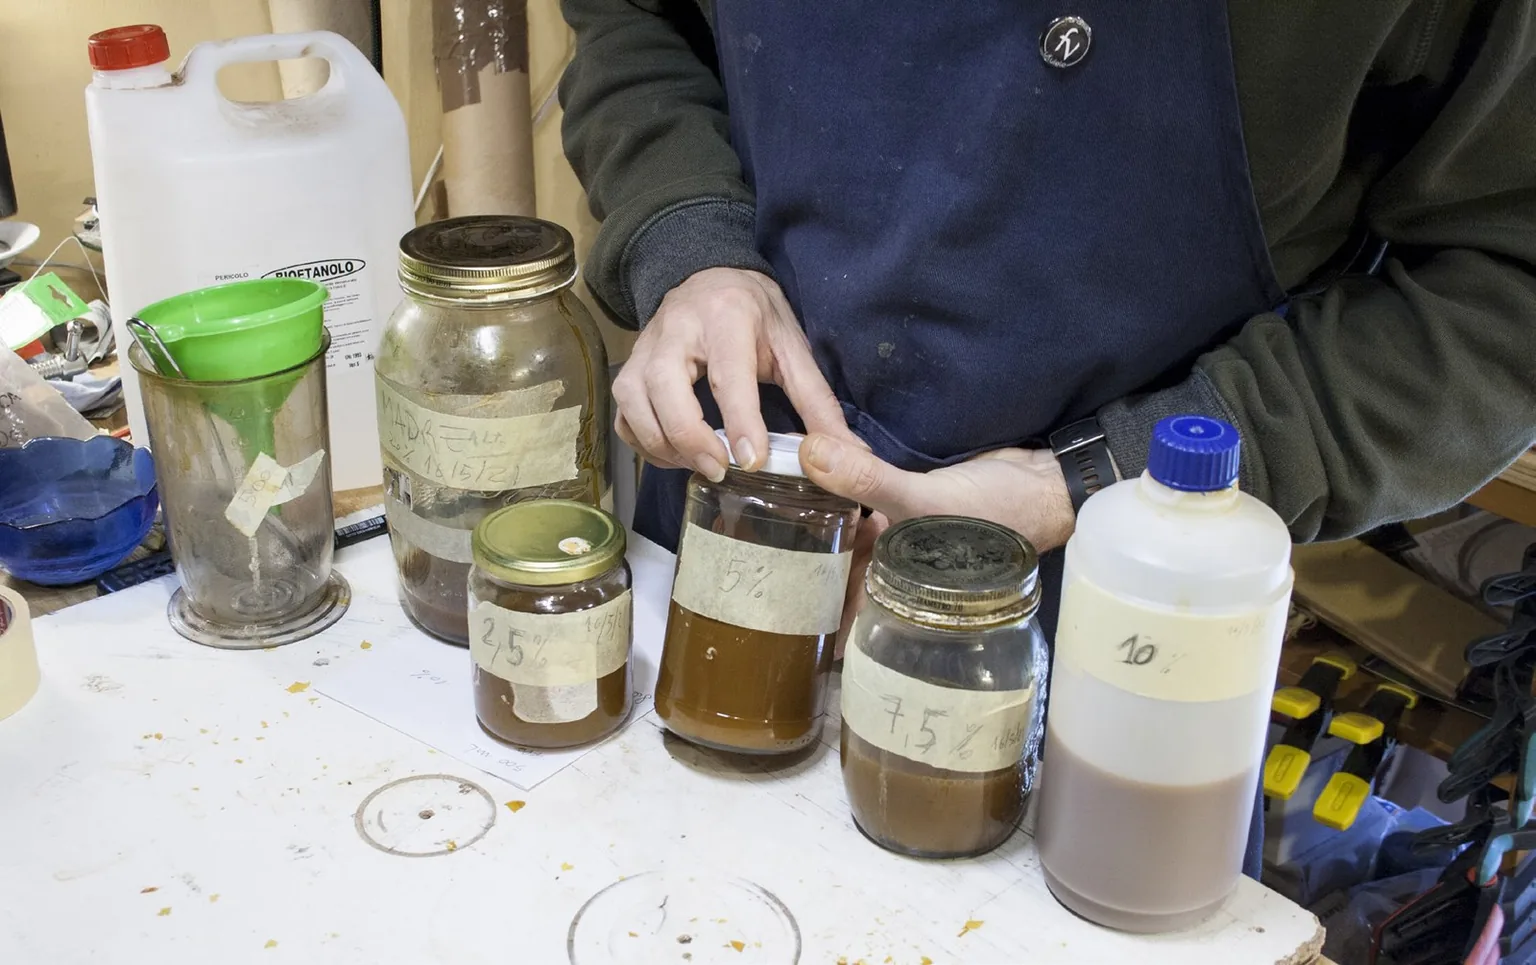
The five solutions ready, from the stock down to 2.5%. The scale of colour makes the falling resin concentration visible. Every label carries the percentage and the date.
4. The pad
How it is made
- A soft, absorbent core, wrapped in two small cloths of linen or cotton about 15x15 cm.
- I make the core from wool: unlike cotton wool it stays soft while still absorbing the varnish. Cotton on its own tends to harden and does not spread the shellac well. The variant I often use is a small cotton wool core wrapped in wool: it gives body without losing softness.
- All white, core included.
Which cloth for which solution
| Solutions | Cloth | Why |
|---|---|---|
| 10% and 7.5% | Linen | The first coats, where more varnish has to be carried. |
| 5% and 2.5% | Cotton | The last coats, where the delicacy of the pass is what counts. |
Building it
- I use a jar as a base: I lay the first linen cloth over the mouth.
- I drop the wool core inside it.
- I pour a little solution into the core.
- I tap it with small presses so the varnish is absorbed and spread evenly.
- I squeeze it just enough to stop it releasing too much.
- I wrap the whole thing in the second cloth and close the tail in the palm of my hand.
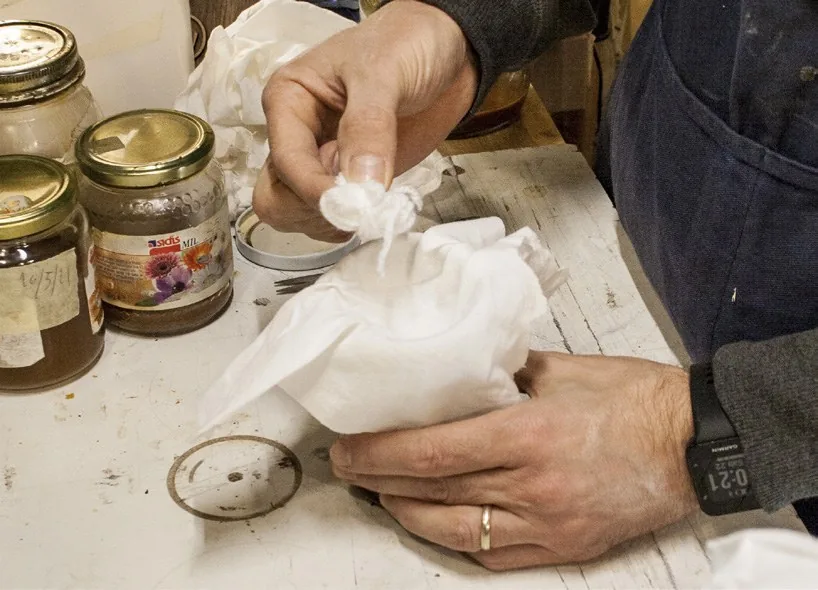
Building the pad: the core is closed inside the first cloth using the jar as a base. On the bench, to the left, the solution jars already labelled and dated.
Storing it
- The pad is kept in an airtight jar.
- I pour a few millimetres of alcohol in the bottom, to saturate the air inside.
- I put a spacer in between: the pad must not touch the alcohol, it should only breathe saturated air.
5. Preparing the wood
A good part of the finish is decided before you open the jar. Preparing means putting the wood in a condition to receive the varnish without running into technical or cosmetic mistakes. There are two operations: taking the surface down to a very fine grain and filling the pores. To those I add the masking.
5.1 Sanding, first series
- I finish the whole surface of body and neck with abrasive paper.
- Sequence: 180 → 220 → 400.
- With the 400 I also soften the edges of the bindings.
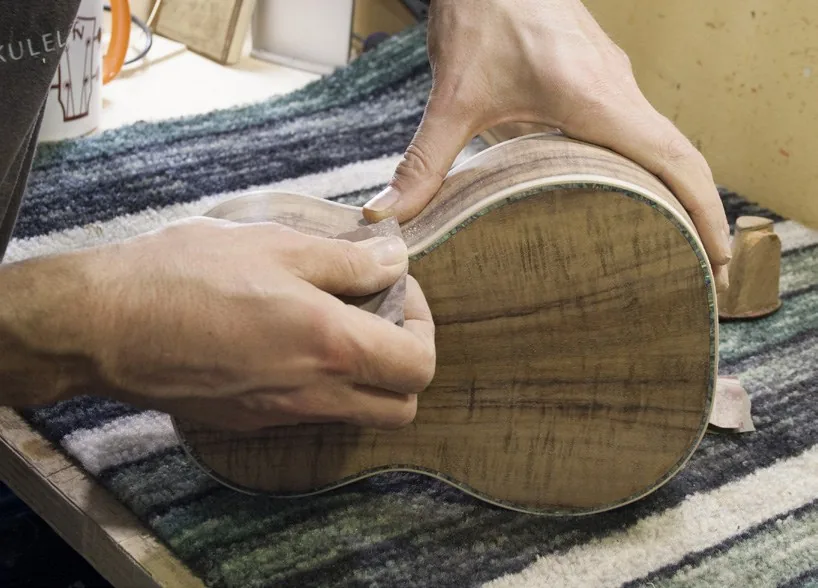
Sanding the koa body and softening the edges of the bindings with 400 grit.
5.2 Raising the grain
- I simply wipe a damp cloth over the whole surface, wetting it thoroughly.
- I wait for it to dry: after a few minutes the surface is completely rough to the touch. Those are the fibres of the wood standing up.
- I remove them with the next pass of abrasive.
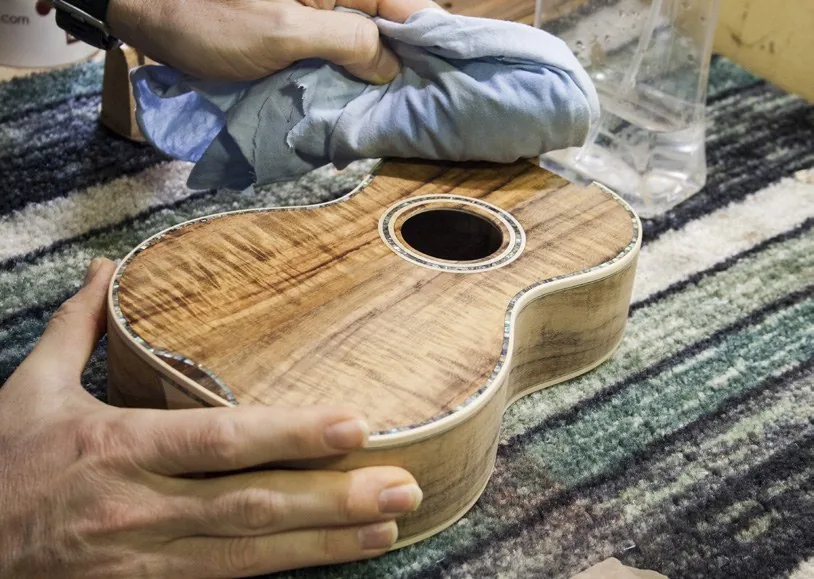
Raising the grain: a damp cloth over the whole surface, to lift the fibres of the wood so they can be removed before varnishing.
5.3 Sanding, second series
- I go back to smooth with 600 → 800 → 1200.
5.4 Filling the pores: four routes
Filling the pores is not compulsory, but it does guarantee a more effective finish in less time. There are four routes, and the choice is partly a cosmetic one.
A) Water-based grain filler
- Professional water-soluble filler, applied with a brush, moving in every direction.
- The key criterion for a transparent finish: the filler has to be as faithful as possible to the colour of the wood it goes on.
- The product I use is a beige paste that lightens further as it dries. It is fine on the mahogany of the neck, but too pale for koa and more so for cocobolo headstock overlays: on dark woods it has to be darkened before use.
- Viscosity — it is a compromise to judge each time: thinner it penetrates better but struggles to fill in a single pass; thicker it fills quickly but penetrates less.
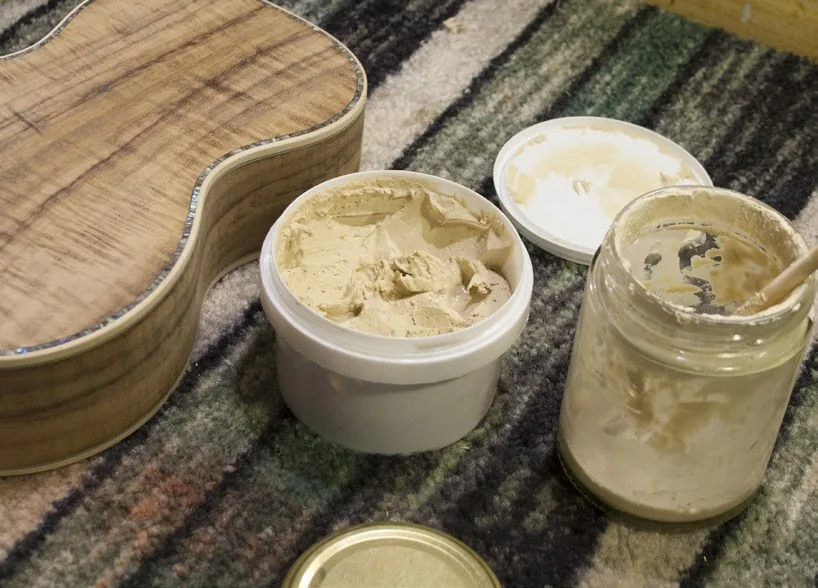
The water-based filler: in the jar the beige paste as it comes, in the pot the version already thinned and corrected. Beside it the koa body: the difference in colour is obvious, which is why the filler has to be darkened before use.
- Once the filler is thoroughly dry I go back to the abrasive. Having been generous in application I start at 220, careful to remove only the top layer, then 400 → 800 → 1200.
- Stopping criterion: I stop when the grain of the wood is clearly visible again. I judge how well the pores have actually filled by holding the wood against the light.
- Sometimes the whole operation has to be repeated: it depends on how porous the wood is.
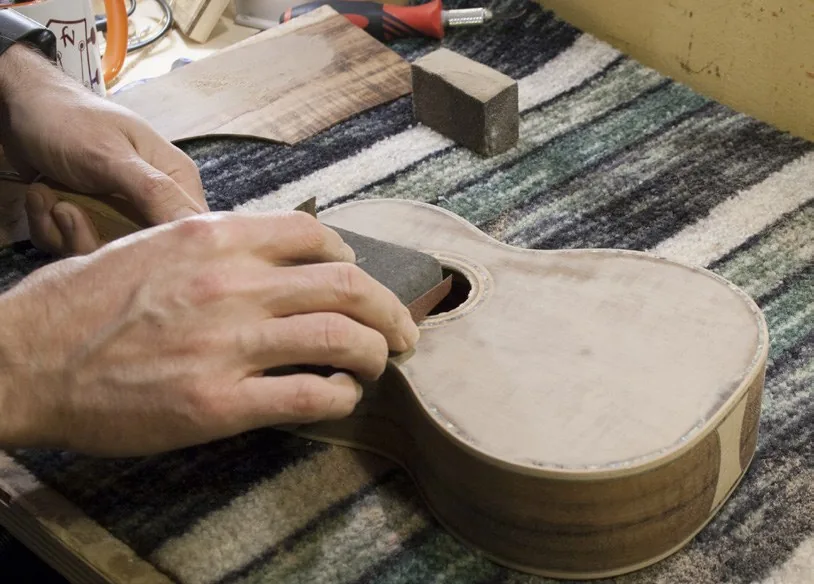
Cutting back the filler. You start at 220 removing only the top layer: when the grain is clearly visible again, you stop.
B) Epoxy grain filler
- One of the most effective ways of filling pores is clear two-part epoxy resin.
- It is spread with a small plastic spreader — an old card works perfectly.
- Curing generally takes about 24 hours, though it depends on the brand and type of resin. Filling the pores completely usually takes 3 sessions.
- You then sand back, aiming to stop at the limit of the resin layer, without reopening the pores of the wood.
C) Pumicing (the traditional route)
- I scatter very fine 4/0 pumice powder over the panel, spreading it evenly. The convenient way is to put it in a cloth bag and dab.
- I wipe a cloth across the grain to take off the excess pumice.
- I work the pad lightly charged with the 2.5% solution, using the passes described at point 8.
- I let it dry thoroughly — 8 hours is not too much — then work over it with 0000 steel wool to remove any lumps that have formed.
D) The half-pore technique
- It consists of leaving out the filler entirely and not filling all the pores.
- It gives the instrument a more handmade look, less glassy.
- It is not a shortcut: the varnish still has to go on, and in fact the pad has to be worked more times than on the filled route.
I use it often, out of preference. One of the most interesting things about shellac is exactly how readily it delivers a higher or lower degree of gloss: it is a parameter you choose, not an inevitable consequence of the technique.
5.5 Masking
- I mask every glue surface with paper tape: glue does not work on a layer of varnish.
- On a ukulele: the bridge area, the fretboard, the tenon and mortise of the neck joint.
- I also prepare two screwed-on supports in the tenon and mortise to hold the parts while varnishing, taking care not to drill too deep.
6. Building the finish, with a brush
6.1 How it goes on
- Soft-bristle brush and the 20% stock solution only, the one with the highest resin content.
- A light, steady pass, along the grain. Do not go back over where you have just been: you would lift the varnish you have only just laid down.
- In the next session I brush across: that is how the layer comes out even.
- I shake the solution well before every use: the resin separates from the alcohol and settles at the bottom.
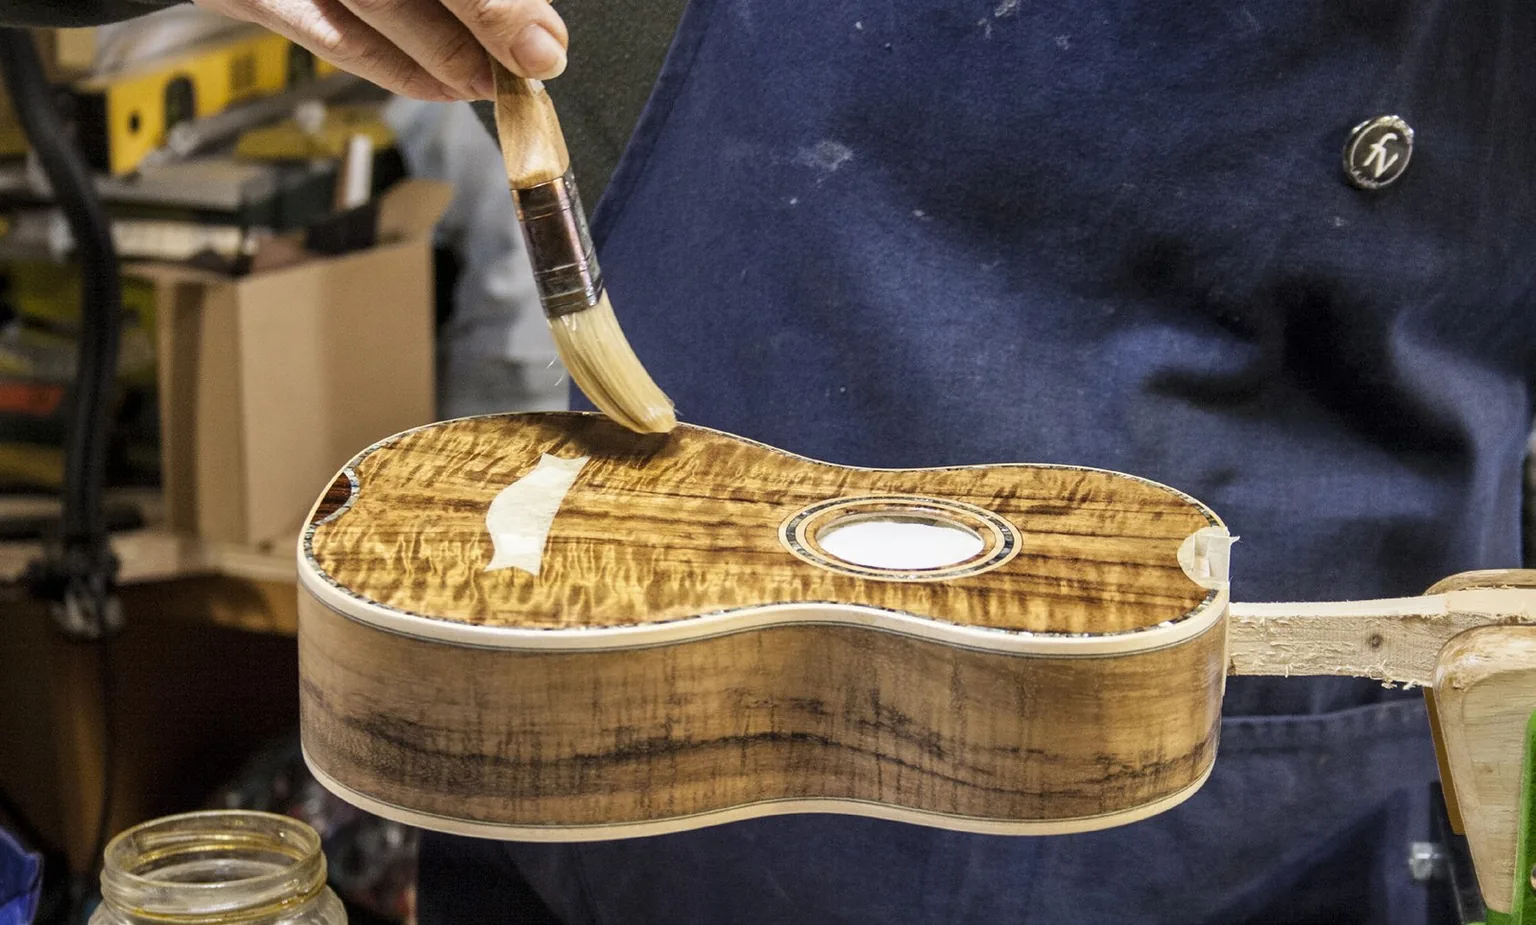
Brushing on the build with the stock solution. On the panel you can see the paper tape masking the bridge glue area.
6.2 How many sessions, and how far apart
- At least 12 hours between one session and the next. The time lets most of the alcohol evaporate: the resin solidifies and is not lifted by the next pass of the brush.
- In the following session the liquid varnish adds itself to the solid layer beneath, dissolving and blending only after the brush has passed.
- The number of sessions is not fixed: it depends on the varnish and on how well you can lay it down. Generally about ten are needed.
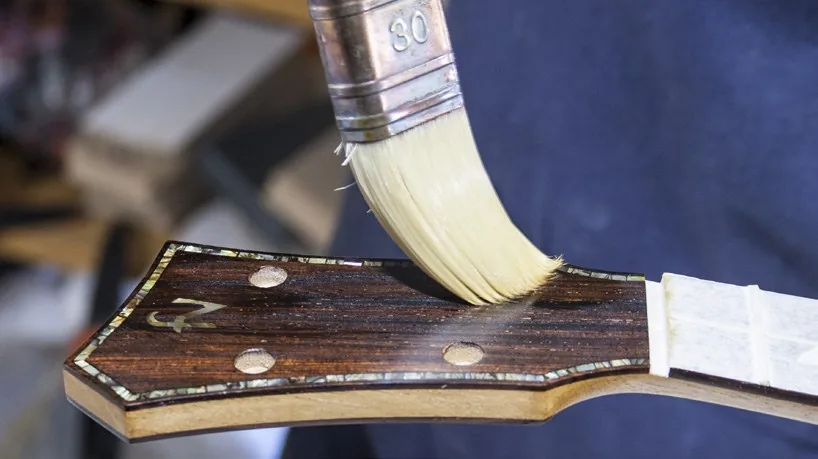
The same operation on the rosewood headstock. Here too the fretboard is masked with paper tape.
6.3 Storing the brush between sessions
- A jar with a little alcohol in the bottom, to keep the air inside saturated.
- The bristles must not touch the alcohol: I hold them clear with a small glass.
- That way the brush stays damp and soft until the next session.
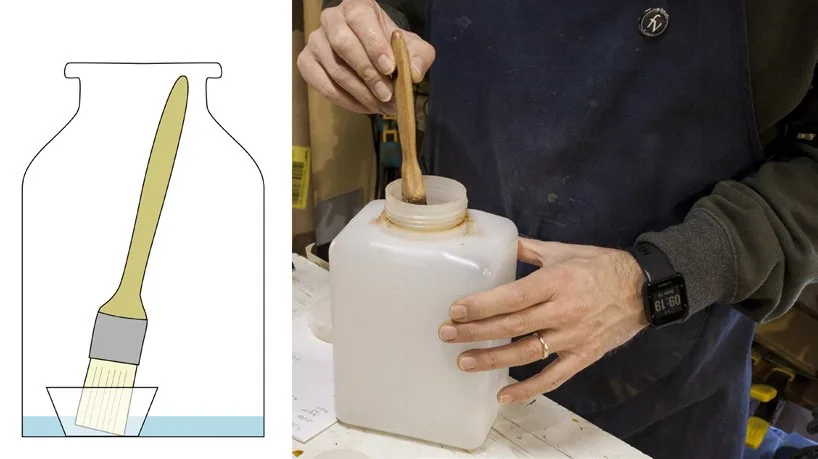
The diagram and the practice: the brush hangs in air saturated with vapour, without dipping the bristles in the alcohol.
6.4 How I know the build is enough
- Before the last sessions I run a levelling (point 7). It does three things at once: removes the brush marks, evens out the layer and above all tells me how much build there is and how many sessions are still missing.
- I know the build is not sufficient when, after levelling, matt patches with defined edges appear.
- In that case I go back to the brush with the stock solution.
7. Intermediate levelling
This is the procedure that separates the brush from the pad, and which then repeats between one group of sessions and the next throughout the polishing. Shorter every time: the marks left by the pad are far less pronounced than those left by the brush.
- 1200 grit abrasive paper, dry or with a little water on the paper — see the box below. Circular passes.
- 0000 steel wool: the surface becomes smooth, even and completely matt. Do not be alarmed by the matt look, it is exactly what is wanted.
- Vacuum and clean: steel wool sheds residue that absolutely must be removed before going back to the varnish. Vacuum and cloth.
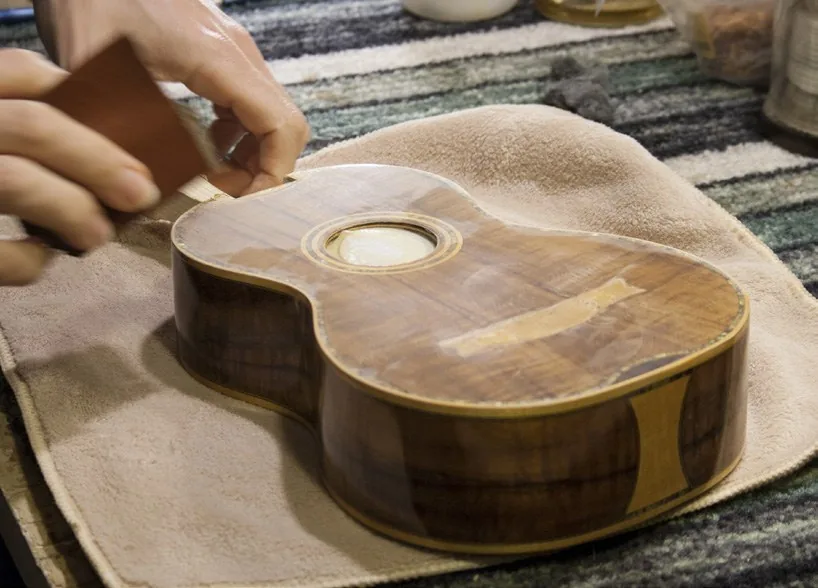
Levelling with 1200 grit and a little water, with a pad behind the paper to spread the pressure.
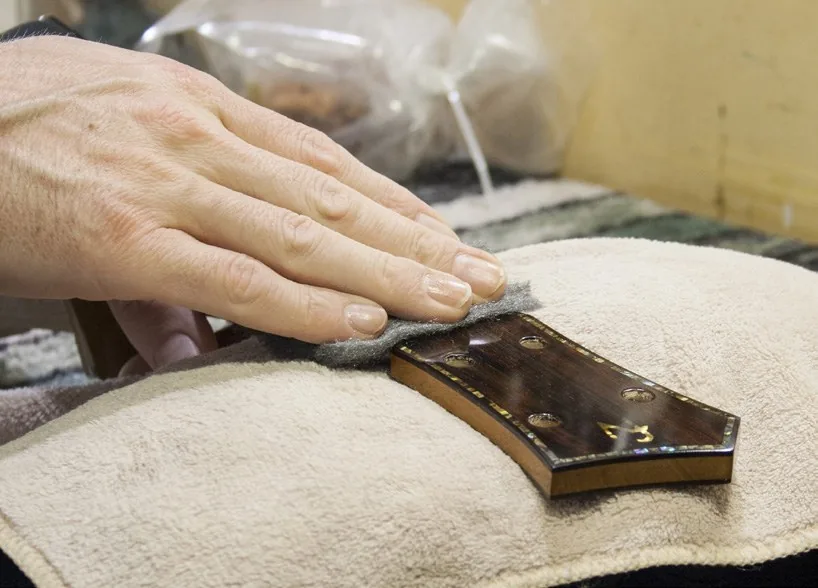
The pass of 0000 steel wool over the headstock. After the wool the surface is completely matt and ready for the next solution.
8. Polishing with the pad
You work through the four solutions in sequence, from the most concentrated to the most alcoholic. During these sessions I keep adding shellac — a very small amount, and progressively less — which integrates with the build, generating a surface layer that grows steadily glossier.
8.1 Charging the pad
- The pad is already lightly soaked. I add varnish on the face, with the pad closed, using a dropper: 4 or 5 drops.
- Then I make a few presses on a clean board to remove the excess and spread it.
- One session takes in several passes, with the pad recharged 3 or 4 times.
8.2 Pale polishing oil
- A touch of pale oil on the pad, when the glide starts to stiffen too much.
- Always sparingly. At this point in the finish the oil stays on the surface, so it causes no problems underneath.
8.3 The grip
- Thumb, index and middle finger on the pad.
- Ring finger, little finger and palm hold the tail of the pad.
- The face in contact with the wood is held flat.
8.4 The three passes
They are worked in sequence, each one in both directions:
- Parallel to the grain — this is the application.
- Circular — clockwise and then anticlockwise.
- Figure-of-eight — one way and the other.
- You finish with the parallel pass again.
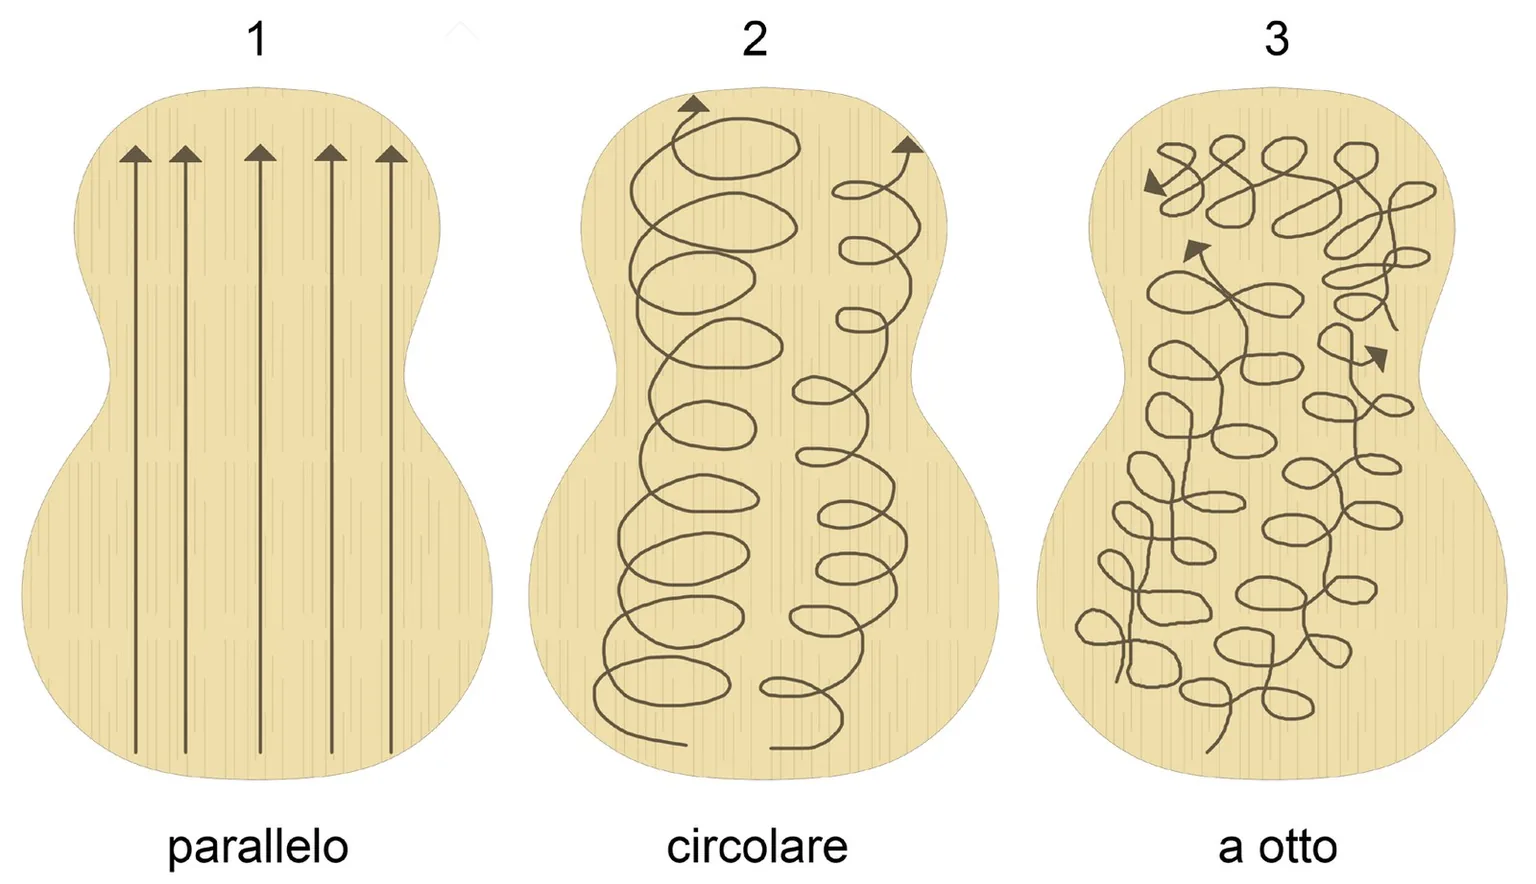
The three pad passes on the same panel. Note that the lines have no sharp beginning or end at the edge: it is the graphic version of the rule below.
8.5 Pressure and speed
| Point in the session | Pressure | Speed | Why |
|---|---|---|---|
| Start — pad charged | light | slow | So as not to lift the resin already laid down. |
| Later — alcohol falling | rising | rising | Speed prevents stopping as friction increases; pressure raises the polishing action. |
These are two things closely tied to the feel of the moment, and therefore to experience. There is no number to give.
8.6 The two trails: the signal to read
- First trail — pad just charged: the pass is softer and the trail is clearly visible.
- Second trail — as you go on, a matt bloom appears and vanishes immediately. That is the alcohol evaporating rapidly and polishing the surface. The pad's resistance rises and the pass becomes harder.
- The end — when the trail disappears entirely the pad is completely dry. Stop. Recharge and repeat.
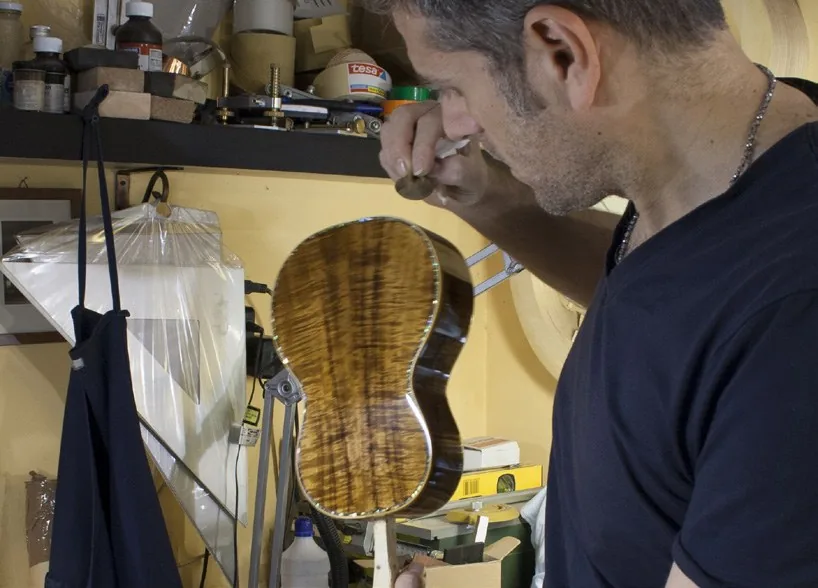
The right way to look at the work: instrument upright and light in reflection. That is how you read the trails and catch haze forming, while it can still be fixed.
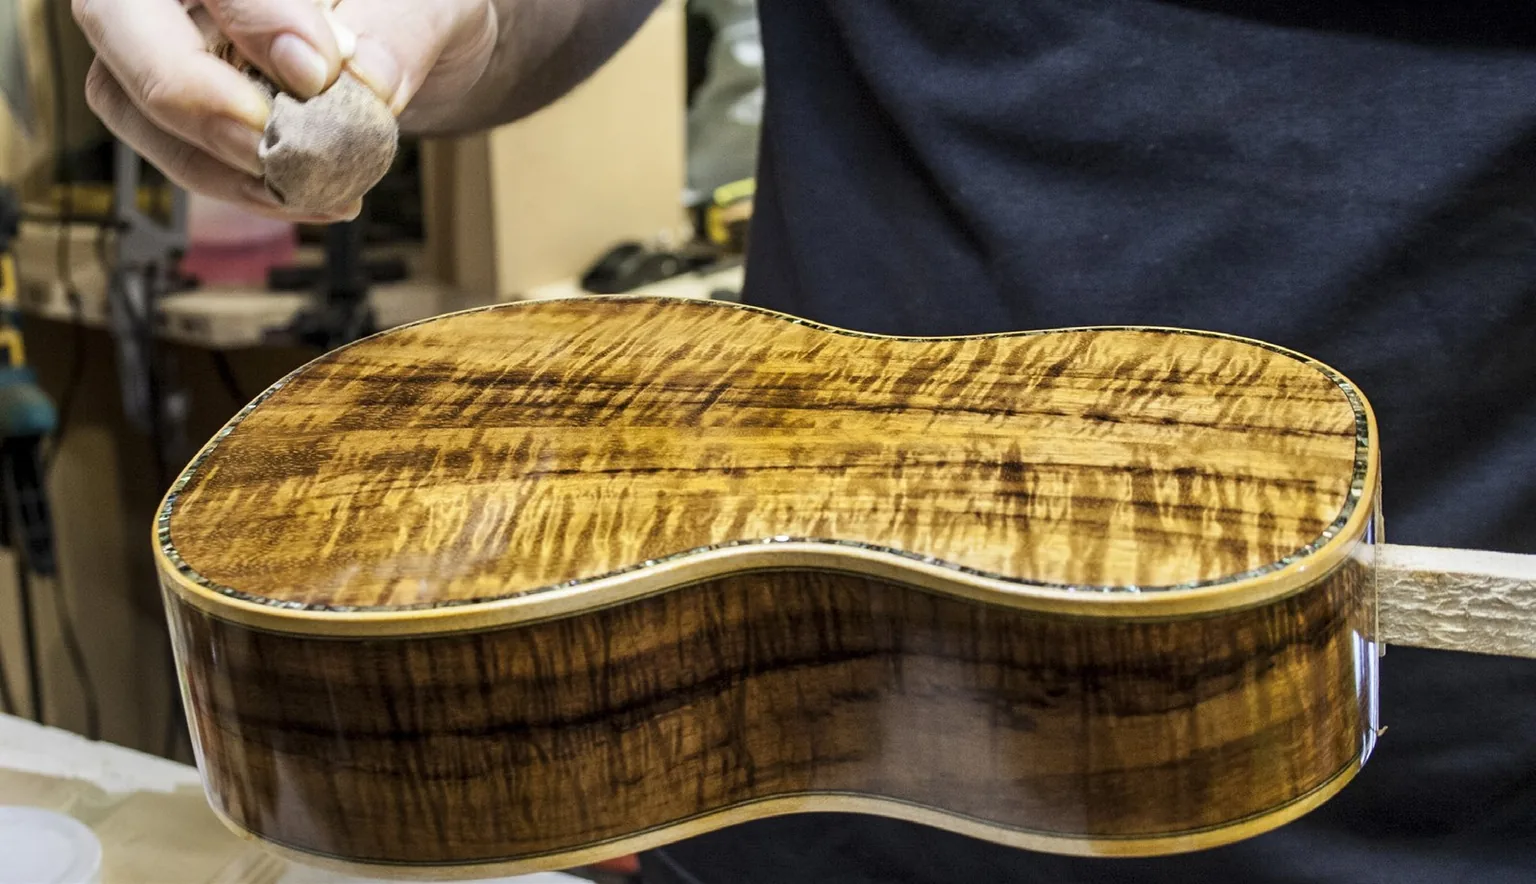
The pad working over the koa body. You can see the surface already glossy and the pad held with thumb, index and middle finger.
8.7 The calendar: three sessions per solution
| Solution | Sessions | Wait between sessions | After the group | Notes |
|---|---|---|---|---|
| 10% | 3 | 8-12 hours | Wait 24-36 h + levelling (1200 + 0000 wool) | Shorter levelling than the one after the brush. |
| 7.5% | 3 | 8-12 hours | Wait 36 h + levelling | Same pad as the 10%. |
| 5% | 3 | 8-12 hours | Levelling with steel wool alone | From here on the solution leaves fewer and fewer marks. |
| 2.5% | 3 | 8-12 hours | This is the polishing proper | Pad replaced so no residue is dragged in. |
8.8 The last solution, the 2.5%
- This is where the surface is actually polished.
- I use a pad tending towards dry and add solution sparingly, several times over.
- I go looking for the second trail, the one from rapid evaporation.
- In the last sessions the passes are very short and all parallel to the grain only.
8.9 Two optional final passes
- A pass with pure alcohol. Pad charged with 3 drops, quick, light passes.
- An abrasive polish for a mirror finish (I use a Super Nikco). As well as adding gloss it cleans and leaves the surface silky. It is a final, optional treatment: it does not replace the benzoin, which is already in the solutions, and it is not a compulsory step in the technique.
9. Haze and defects: recognising them and putting them right
| Type | How it looks | Cause | Remedy |
|---|---|---|---|
| 1 | Visible only at a certain angle of light; keeps some gloss. | Pad overcharged, application not completed. | One more session with the pad is enough. |
| 2 | Slightly matt, with a soft, ill-defined edge. | Accumulated oil. | A cloth. If there really was too much oil: steel wool and then the pad. |
| 3 | Sharp, well-defined edge, matt and uniform look. Typically over a change in the grain on strongly figured woods. | The build has been thinned too far: levelling or a pad pass worked too insistently, taking resin off. | The pad is not enough to rebuild the layer. A small brush on that area only, with the 20% solution — the stock, never a more alcoholic one; then dry, 1200 grit worked gently to flatten the brush marks, then the pad. Sometimes it takes several goes. |
| 4 | The burn. Completely matt from every angle, edges sharp and obvious. Genuinely ugly. | Alcohol has penetrated the wood and dissolved the resin completely: an overcharged pad, or a prolonged stop while applying or polishing. | Pad and brush are useless, and more often than not they make it worse. It has happened to me once, years ago: I had to sand the panel almost back to bare wood and start again from scratch. |
A defect that starts earlier: lumps
Lumps and build-up under the finished surface do not come from the pad but from filtering done badly (see point 3). And white specks come from excess pumice. They are the two defects that form at the beginning and get paid for at the end.
10. What "it came out well" actually means
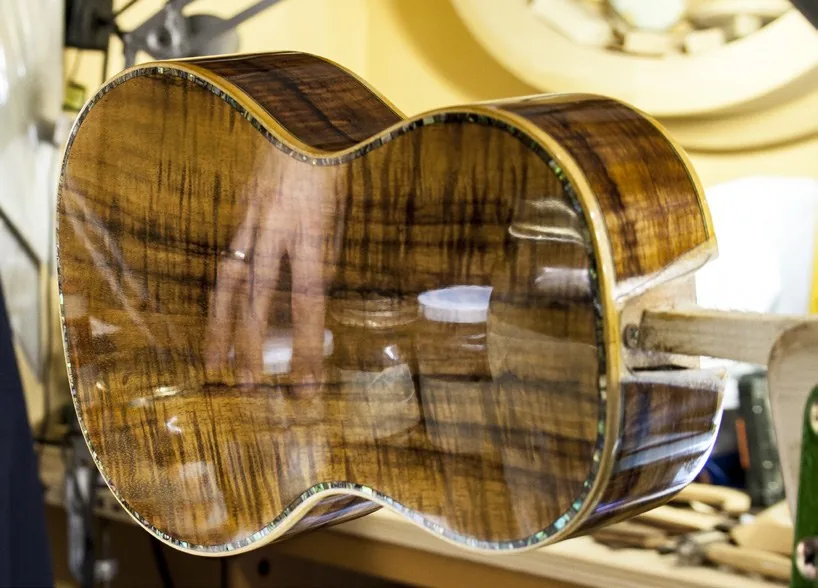
The final result on the koa back. The reflection measures the gloss, but the point is elsewhere: looking at the figure, you can see the finish stays even across the changes in grain, which are the hardest places.
- After years of using this technique I realise the final result is never identical. Awareness grows with time, but each time is a small challenge whose outcome is anything but guaranteed.
- What I have certainly learned is to accept a compromise, rather than dragging things out forever chasing some ideal result.
Which brings back the freedom I mentioned at point 5: between the full polish and the half-pore finish there is no right version and wrong version. Each of us can manage and carry out a finish according to our own taste.
Two things that change the result and are not up to you
- Woods take varnish differently. The more porous ones need more varnish, and that holds regardless of whether filler was used.
- The grain conditions how shellac behaves. On steady, plain grain the finish comes out even; on figured woods such as koa you have to expect troublesome variation exactly where the grain changes most sharply. That is where the third type of haze shows up.
To these add the quality of the varnish, the temperature of the room and above all the ability to judge on the spot how to proceed. That last one cannot be bought and cannot be read: it has to be done.
11. After polishing: care over time
- A month for complete evaporation. Shellac dries in minutes, but the alcohol only evaporates fully after about a month. During that period the film is still young: no tight cases.
- A refresher after a month. Once the surface has stabilised, one further light pass of the 2.5% solution closes the job and revives the gloss.
- Heat is enemy number one. Shellac is very sensitive to heat: never leave the instrument in a car in summer, next to a radiator or in the sun from a window.
- Routine cleaning: a soft dry cloth, or one barely damp. Avoid alcohol and anything containing it — they would dissolve the finish — and avoid harsh detergents.
- Hand perspiration is aggressive over the long term: wiping the instrument down after playing is the most effective maintenance there is.
- Repairability. This is the great advantage of the finish: a scratch or a dull patch can be re-polished locally with the pad, without stripping the instrument. Something impossible with most modern finishes.
12. Summary: every stage on one page
| # | Stage | What I use | Times and waits |
|---|---|---|---|
| 1 | Sanding | 180 → 220 → 400 grit | The 400 softens the edges of the bindings. |
| 2 | Raising the grain | Damp cloth | A few minutes to dry. Compulsory. |
| 3 | Sanding | 600 → 800 → 1200 grit | — |
| 4 | Filling the pores | Water-based or epoxy filler (or 4/0 pumice, or nothing) | 1-2 passes water-based, about 3 with epoxy, depending on the porosity of the wood. |
| 5 | Cutting back the filler | 220 → 400 → 800 → 1200 grit | Stop when the grain is clearly visible again. |
| 6 | Masking | Paper tape | Bridge, fretboard, tenon and mortise. |
| 7 | Build, with a brush | 20% stock solution only | At least 12 h between sessions. About 10 sessions. |
| 8 | Levelling | 1200 grit (wet or dry) + 0000 wool | Then vacuum the residue. Repeats between groups. |
| 9 | Pad, 10% | Linen cloth | 3 sessions, 8-12 h apart. Then 24-36 h + levelling. |
| 10 | Pad, 7.5% | Linen cloth, same pad | 3 sessions, 8-12 h. Then 36 h + levelling. |
| 11 | Pad, 5% | Cotton cloth | 3 sessions, 8-12 h. Then levelling with wool alone. |
| 12 | Pad, 2.5% | New pad, cotton cloth | 3 sessions, 8-12 h. Short passes, parallel only. |
| 13 | Finishing touches (optional) | Pure alcohol; abrasive polish; or wool for matt | Pure alcohol: 3 drops, quick light passes. |
| 14 | Curing | — | About 1 month for complete evaporation. Then a refresher at 2.5%. |
The four solutions, in brief
| Solution | How it is made | Cloth | What it is for |
|---|---|---|---|
| Stock 20% | 200 g of flakes in 1 litre of alcohol | — (brush) | Building the build. |
| 10% | 2 parts stock + 2 alcohol | Linen | First cut with the pad. |
| 7.5% | 3 parts 10% + 1 alcohol | Linen | Evening out. |
| 5% | 2 parts 10% + 2 alcohol | Cotton | Starting to polish. |
| 2.5% | 2 parts 5% + 2 alcohol | Cotton | The polishing proper. |
13. If you want to see how it is done
Every photograph in this guide comes from my book «Diario di Costruzione di un Ukulele Soprano» (Volontè & Co., 2021), which follows the complete build of an instrument from choosing the woods to the finished instrument.
- Three whole chapters are devoted to shellac: preparing for the finish (ch. XII), shellac as a material together with the solution recipes (ch. XIII), and the finishing itself (ch. XIV).
- The chapter on finishing is the one with the most demonstration videos in the whole book — four of them: brushing on the varnish, preparing for the pad, building the pad, and applying and polishing with the pad.
If you want to learn it in person
A book and a guide only take you so far: charging the pad and reading the trail are learned with your hands, by watching and trying. If you want to learn, come and find me at my school: the Scuola di Liuteria UMA LAB, in via dell'Aquila Reale 23 D-E, Rome.
Closing note
This guide sets out the steps for achieving a good French polish and is written with beginners in mind, but it cannot replace hands-on experience, which remains the most important element in getting an excellent result. The method described here is based on the classical techniques, with a few refinements picked up over years at the bench.
For any clarification, correction, comment or information you can contact me through the contact section of the site. Corrections are welcome: this page is alive, and I have already updated it several times.